第5回の内容
Oracleがアマゾンに提供しているOracle 10g XE はシングルバイトのモジュールで日本語が使用できないのでアマゾンのLinuxのAMIにOracle 10g XE のUniversal版をインストールする説明をします。
OracleのサイトからOracle 10g XEのインストールを入手してAMIにコピーしてからは普通のLinuxにインストールする手順と同様です。簡単に以下のステップを説明します。
・OracleのサイトからOracle Database 10g Express EditionのRPMを取得
・Oracle Database 10g Express EditionのRPMをAmazon EC2インスタンスにコピー
・Oracle Database 10g Express Editionのインストール
・アクセスポートの解放
・AMIの作成
・AMIの登録
OracleのサイトからOracle Database 10g Express Editionを取得
以下のサイトからrpmをダウンロードします。
http://www.oracle.com/technology/software/products/database/xe/htdocs/102xelinsoft.htmlダウンロードするにはOracleのサイトへユーザ登録が必要でログイン後にライセンス条項への同意が必要なため一度ローカルのPCにダウンロードしてscp(SecureCopy)でアップロードしました。
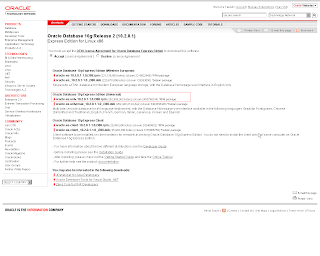
上記画面上のAccept License Agreementのラジオボタンをクリックしてライセンス条項に同意して、Oracle Database 10g Express Edition (Universal)の oracle-xe-univ-10.2.0.1-1.0.i386.rpm (262,909,363 bytes) (cksum 2403796334) *RPM package をクリックしてダウンロードします。
Oracle Database 10g Express EditionのRPMをAmazon EC2インスタンスにコピー
第2回で紹介したSSHクライアントのPuTTYに付属のscpコマンド:pscpを使ってEC2インスタンスにRPMをコピーします。250MBぐらいのファイルのアプロードに約2時かぐらいかかりました。
ちなみに弊社はのインターネット回線はフレッツ光です。
以下、実行例)
C:\AWS>pscp -i id_rsa-my-test-keypair.ppk oracle-xe-univ-10.2.0.1-1.0.i386.rpm root@ec2-67-202-25-135.compute-1.amazonaws.com:/tmp
oracle-xe-univ-10.2.0.1-1 | 256747 kB | 35.2 kB/s | ETA: 00:00:00 | 100%
Oracle Database 10g Express Editionのインストール
※詳しくは
インストールガイド(英語)を見てください。
システム要件は以下の通りです。
OS
Red Hat Enterprise Linux RHEL3 and RHEL4
Suse SLES-9
Fedora Core 4
Red Flag DC Server 5.0/MIRACLE LINUX V4.0/Haansoft Linux 2006 Server (Asianux 2.0 Inside)
Debian 3.1
必要なパッケージ:
glibc - 2.3.2
libaio - 0.3.96
Unix・Linux系のOracleはKernelパラメーターを設定しなければいけませんがXEのインストーラはチェックして値が小さい場合は勝手に変更してくれるようです。
・システム要件の確認
libaio と glibc がインストールされているか確認します。
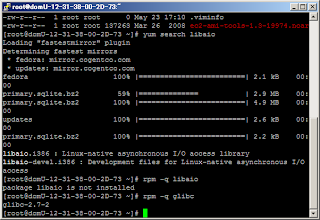
libaio はデフォルトでは入っていないのでインストールします。
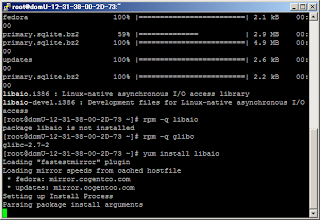
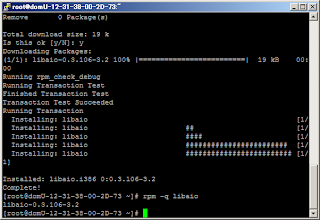
・RPMを使ったOracle XEのサイレントインストールを行います。
コマンドラインから以下のように実行してインストールしてOKですがここではサイレントインストールの手順を説明します。
# rpm -ivh /downloads/oracle-xe-univ-10.2.0.1-1.0.i386.rpm
◆サイレントインストール手順
1)RPMファイルを配置するディレクトリの作成
※わかりやすくするためにインストールガイドと全く同じようなディレクトリ構成にしました。
2)アップロードしたRPMのmv
3)サイレントインストール用のパラメータファイル(responsefile)の作成
4)サイレントインストール用のシェル作成
5)サイレントインストール用シェルの実行
# mkdir /downloads (1)
# mv /tmp/oracle* /downloads (2)
# ls /downloads
oracle-xe-univ-10.2.0.1-1.0.i386.rpm
#
# ls -al
合計 257020
drwxr-xr-x 2 root root 4096 2008-10-01 06:29 .
drwxr-xr-x 23 root root 4096 2008-10-01 06:24 ..
-rw-r--r-- 1 root root 262909363 2008-10-01 05:23 oracle-xe-univ-10.2.0.1-1.0.i386.rpm
-rw-r--r-- 1 root root 35 2008-10-01 06:21 responsefile
-rwxr--r-- 1 root root 196 2008-10-01 06:29 xesilentinstall.sh
#
(3)で作成したresponsefile(5行のテキストファイル)
# more responsefile
8090 <--- Oracle 10g XE のWeb管理アプリポート(デフォルト8080)
1521 <--- Oracle database listenerのポート(デフォルト1521)
ここはsysのパスワード
ここはsystemのパスワード
y <--- OS起動時にOracleも自動起動するかの指定(yesで自動起動)
(4)で作成した起動シェル
# more xesilentinstall.sh
#!/bin/bash
rpm -ivh /downloads/oracle-xe-univ-10.2.0.1-1.0.i386.rpm > /var/log/XEslilentinstall.log
/etc/init.d/oracle-xe configure < /downloads/responsefile >> /var/log/X
Esilentinstall.log
5)サイレントインストール用シェルの実行
#./xesilentinstall.sh
#
※インストールログ(/var/log/XEsilentinstall.log)を確認しましょう。
# more /var/log/XEsilentinstall.log
準備中... ###############################################
###
This system does not meet the minimum requirements for swap space. Base
d on
the amount of physical memory available on the system, Oracle Database 1
0g
Express Edition requires 1024 MB of swap space. This system has 895 MB
of swap space. Configure more swap space on the system and retry the in
stallation.
oracle-xe-univ ############################################
######
Executing Post-install steps...
You must run '/etc/init.d/oracle-xe configure' as the root user to
configure the database.
Oracle Database 10g Express Edition Configuration
-------------------------------------------------
This will configure on-boot properties of Oracle Database 10g Express
Edition. The following questions will determine whether the database sh
ould
be starting upon system boot, the ports it will use, and the passwords t
hat
--続ける--(52%)
will be used for database accounts. Press
to accept the default
s.
Ctrl-C will abort.
Specify the HTTP port that will be used for Oracle Application Express [
8080]:
Specify a port that will be used for the database listener [1521]:
Specify a password to be used for database accounts. Note that the same
password will be used for SYS and SYSTEM. Oracle recommends the use of
different passwords for each database account. This can be done after
initial configuration:
Confirm the password:
Do you want Oracle Database 10g Express Edition to be started on boot (y
/n) [y]:
Starting Oracle Net Listener...Done
Configuring Database...Done
Starting Oracle Database 10g Express Edition Instance...Done
Installation Completed Successfully.
To access the Database Home Page go to "http://127.0.0.1:8090/apex"
#
◆Oracleユーザの環境変数設定
Linuxのロケールを設定してOracleの提供するシェルを実行すると言語系の環境変数が設定されます。.bash_profileに以下の設定をします。
1)LANGの設定
2)oracle_env.sh の呼び出し
# su - oracle
-bash-3.2$ ls -al
合計 28
drwxr-xr-x 4 oracle dba 4096 2008-10-01 07:01 .
drwxr-xr-x 3 root root 4096 2008-10-01 06:29 ..
-rw------- 1 oracle dba 275 2008-10-01 06:55 .bash_history
-rw-r--r-- 1 oracle dba 189 2008-10-01 07:01 .bash_profile
-rw------- 1 oracle dba 1520 2008-10-01 07:01 .viminfo
drwxr-xr-x 3 oracle dba 4096 2008-10-01 06:29 app
drwxr-xr-x 3 oracle dba 4096 2008-10-01 06:29 oradata
-bash-3.2$ pwd
/usr/lib/oracle/xe
-bash-3.2$ vi .bash_profile
export LANG=ja_JP.UTF-8
. /usr/lib/oracle/xe/app/oracle/product/10.2.0/server/bin/oracle_env.sh
-bash-3.2$
アクセスポートの解放
◆Elasticfoxの画面から行う例
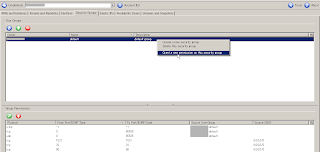
ElasticfoxのSecurity Groupsタブをクリックすると現在解放されているポートが表示されます。EC2のセキュリティはEC2のオーナー(ユーザ)毎に任意のグループを作成(複数可能)してそこに対してポリシーを設定します。作成したグループをインスタンス起動時に指定してセキュリティを有効にします。
デフォルトでdefaultというグループがあるので何も指定しない場合はdefaultグループに設定したセキュリティが有効になります。
上記の画面は、Your Groupsにリストされているグループを選択して右クリックしてメニューが表示されている状態です。
ここで Grant a new permission on this security group を選択してクリックすると以下の画面が表示されます。
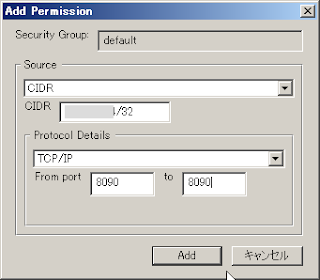
この画面から解放するプロトコル、ポートやアクセス元の制限を設定します。
上記の例はTCP/IPを8090ポートで指定したIPアドレスからだけアクセスすることが出来る設定です。
◆AWS用コマンドラインツール(ec2-api-tools)から行う例
C:\AWS>ec2-authorize default -p 8090 -s 192.168.0.10/32
GROUP default
PERMISSION default ALLOWS tcp 8090 8090 FROM CIDR 192.168.0.10/32
AMIの作成
これでとりあえずOracle 10g XEのUniversal版のセットアップが終了したのでこの状態でAMIの作成をします。AMIの作成は第2回で説明していますのでそのとおりやるだけです。
・AMIにRSAキーペアのバンドル
認証ファイルとPキーをAMI環境へコピー(Secure copy)する
C:\AWS>pscp -i id_rsa-my-test-keypair.ppk pk-キー名.pem cert-キー名.pem root@ec2-67-202-25-135.compute-1.amazonaws.com:/mnt
pk-キー名 | 0 kB | 0.9 kB/s | ETA: 00:00:00 | 100%
cert-キー名 | 0 kB | 0.9 kB/s | ETA: 00:00:00 | 100%
C:\AWS>
・EC2にコピーしたRSAキーペアをバンドルしたAMI(oracle10gXE32bitUniv)を作成
※AMI名は任意。
# ec2-bundle-vol -d /mnt -k /mnt/pk-キー名.pem -c /mnt/cert-キー名.pem -u EC2のユーザID -r i386 -p oracle10gXE32bitUniv
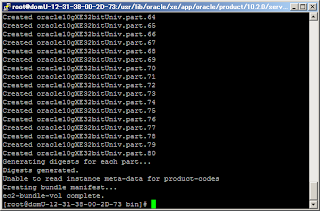
・S3にAMIファイルの格納用フォルダを作成(101oraclexe)
※S3に作成するフォルダ名は任意。
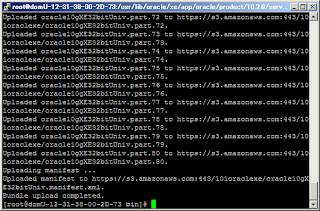
・S3にAMIファイルをupload
# ec2-upload-bundle -b 101oraclexe -m /mnt/oracle10gXE32bitUniv.manifest.xml -a アクセスキー -s シークレットキー
AMIの登録
・EC2へ作成したAMIを登録
C:\AWS>ec2-register 101oraclexe/oracle10gXE32bitUniv.manifest.xml
IMAGE ami-AMIの番号
C:\AWS>
・登録されたAMIをElasticfoxで確認します。
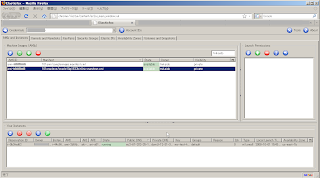
これでEC2のインスタンスを停止してもまたこのAMIを利用して現在の状態でインスタンスを再起動できるのですが。。実はここで問題が起きます!
普通にインストールしたままだと再起動するとリスナーが起動しません。
問題の原因は以下にあります。
・EC2のインスタンスは起動するたびにIPアドレスが変わってしまいます。
・Oracleのリスナーはhost名またはIPアドレスを構成ファイルに明記します。
次回はこの問題の解決について説明したいと思います。


